
As Coronavirus begins to send the workforce back to work from home we’ve seen a huge explosion in the interest of virtual meetings such as Zoom, Google Meetings and Microsoft Teams. If you’ve ever joined a virtual meeting you know that it can be frustrating and sometimes embarrassing these meetings can be. Since I’ve found myself at the intersection of digital transformation and video production over the years, I think I can share with you some no-budget ways you can improve the quality of your virtual meeting presentation.
Audio
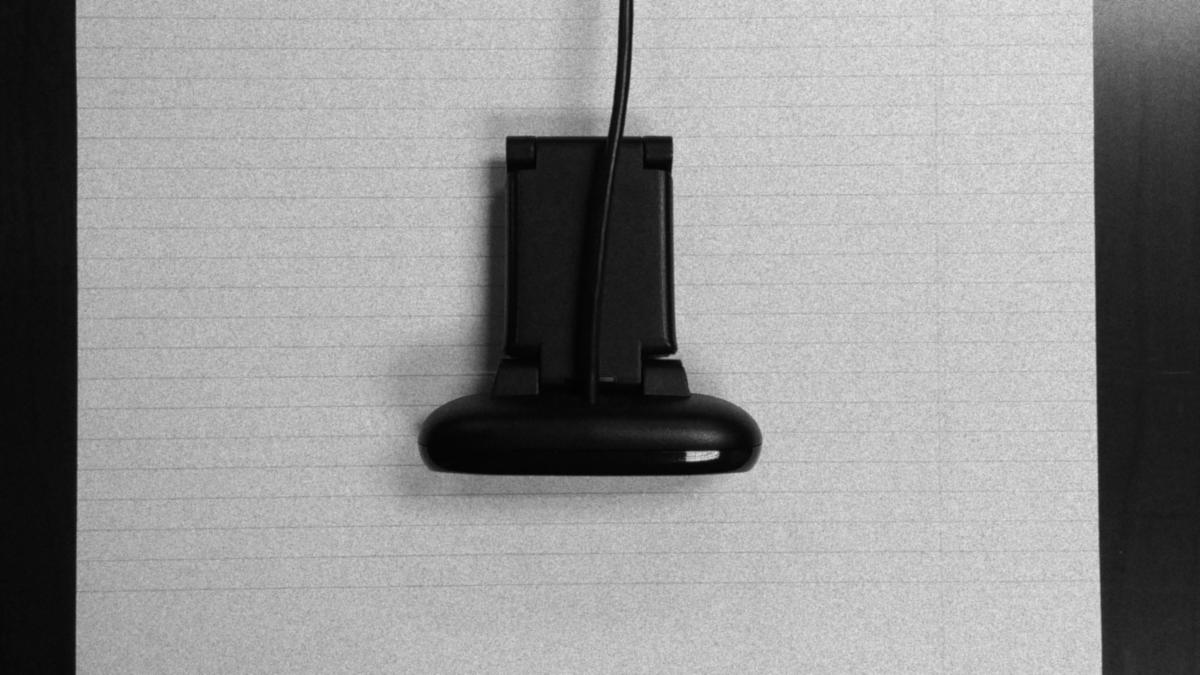
One classic mistake that everyone seems to make is to forget about their audio quality. Afterall, what’s the point of the meeting if nobody can make out what you’re saying? Pretty much every laptop I’ve come across has absolutely terrible audio quality coming from it’s built in microphones. Yes, that includes your laptop as well. It doesn’t matter if you’ve spent $2,000 on your laptop or if your laptop has 2 “noise canceling” mics, they’re almost certainly bad. Luckily, you’ve probably already have a better microphone solution! I’ve found that the mic included in most wired headphones—especially the Apple brand that comes with iPhones—have surprisingly good mics. Furthermore, if your laptop is less then 10 years old then it likely has the proper TRRS jack to tap off the mic in your headphones. Just plug them in and switch your audio device and you’ve got good audio!
Blocking
Another classic mistake people make in their virtual meetings is bad camera placement. Also known as “blocking”, bad camera placement in virtual meetings usually takes the form of a shot right up your nostrils or a shot with sky-high headroom. Luckily, this is very easy to fix with a little bit of forethought before you start you meeting. Usually, you can see a feedback of your camera before you meeting starts and if not, you can always check the settings panel of your chosen virtual meeting software to see what your camera output looks like. Then, you can set your laptop on top of a cardboard box, a stack of books, or any other makeshift elevations device so that your webcam is at eyelevel of yourself. This is to provide a natural relationship between you and the camera as if the camera was another pupil inside of your meeting. If you stack isn’t high enough you can alternately adjust your office chair lower by pulling on it’s lever. Once you have your camera’s elevation fixed you can then tilt your laptop’s screen so that it becomes 90 degrees vertical to remove as much headroom as possible. 90 degrees is the optimal position to have a natural looking perspective from your camera but, if you still end up with headroom and you can’t adjust your stack or your chair anymore accurately then you can tilt your camera down or up slightly outside the desired 90 degree angle. I usually like it when 1/8th to 1/16th of the top of the screen is headroom and the rest of the screen is my head and body to form a nice medium shot as I called it back in film school.
Lighting
Most people also seem to forget about lighting in their virtual meetings. Lighting can sometimes provide a challenge to get right as well. For example, my office is lit almost entirely from the right side. This can lead me to having a two-faced look with one side lit brightly and the opposite side being dimly lit. Surprisingly, you might already have a good solution to this. If you have a car you also probably have a sunshade that you place behind your windshield on hot, sunny summer days to keep your car marginally cooler when its not running and to protect your dashboard from UV induced deterioration. You can take the shiny side of your sunshade and place it just outside of the view of your camera on the opposite to your side with the window. This fills the once dark side with reflected light without the need for a lamp! If you do not have a car sunshade but, instead have a gooseneck style desk lamp you can make use of that instead by bending the gooseneck up to point it to your face. However, I’ve found this to be more difficult to get good results with. A car sunshade has the advantage of providing a weaker light source to your window with the same color temperature and therefor provides more pleasing, less dynamic light gradient. However, a desk lamp typically overblows your shot and introduces the issue of mismatched color temperature in your shot. If you have a lower wattage daylight bulb, you can replace your current bulb with that to closer match the color temperature and brightness of your window. You can also attempt to clip a wax baking sheet to your lamp but, this carries a fire risk so, I don’t recommend it often. If you light your scene well you may also be delighted by an increase in framerate from your camera. This is because webcams lack many of the features of a real camera such as an adjustable aperture. To make up for this, webcams adjust their exposure by increasing the amount of time the sensor “captures” light. In dark environments this can take up so much time that it can lead to a reduced framerate.
Use Your Smartphone’s Camera
Even after all of these steps you may find your picture to be unfitting for your purpose. Is it still grainy or blurry? I’m not surprised since built-in webcams have not advanced much in 15 years. However, thanks to everyone’s appetite for taking selfies, smartphone rear facing cameras have improved dramatically. Since most virtual meeting software often have an app version that you can sign into for free, I recommend giving it a try. Often, they can make use of external mics such as the ones on your headphones mentioned earlier so, I recommend that you take advantage of that. However, the difficulty of using your smartphone in virtual meetings is the blocking issue mentioned earlier. Since phones are so small and thin it can be difficult to prop them up to have a good perspective. You can try to get around this fact by taping your phone to a smaller upright object while it is on top of your hand-crafted camera elevation device.
Virtual Backdrops
Virtual meeting software such as Microsoft Teams have made a big advertising push with their virtual backdrops that can replace your normal backdrop that comes from your camera feed. At first, I didn’t recommend these as I found their software to key out your background to be too strong and their included backgrounds to be too exciting. I’m not a fan of fancy and exciting virtual backgrounds because I believe that they can distract your audience from what’s important: your message. However, after some thought, I figured out a way you can make use of this feature in a subtle way. If you don’t like cleaning your office for every single virtual meeting you can clean your office just once and take a picture with your webcam in its standard placement. Then, you can replace your messy background with you previously prepared clean one. If you have virtual meetings that take place in the evening, make sure to take your clean shot at night as well.
These are all the tips I have for improving your video meetings without a budget! If you have any suggestions, please send them off to my “Contact” page and if I get enough feedback I might release a sequel to this blog post that’ll be low budget suggestions to improve your video meetings. Happy filming!
